We invite you on a journey to discover a curated collection that captures the essence of seaside living, from nautical-inspired fashion to home decor that echoes the rhythm of the ocean waves. Every visit is a celebration of Cape Cod's unique allure. Join us in embracing the spirit of coastal living and uncover the treasures that make Cape Cod more than a destination – it's a lifestyle.
If you want to know How to Grow Hydrangeas you've come to the right place. Hydrangeas are Cape Cod's unofficial flower. In fact, Cape Cod is hosting its inaugural Hydrangea Festival this year. So it's no wonder, when people buy a home on Cape Cod one of the first things they do is buy a Hydrangea bush. I'd imagine there's probably an unspoken list of things you need to buy for your new Cape house...
"Everything You Need for Your Cape Cod Cottage:"
1. Hydrangeas
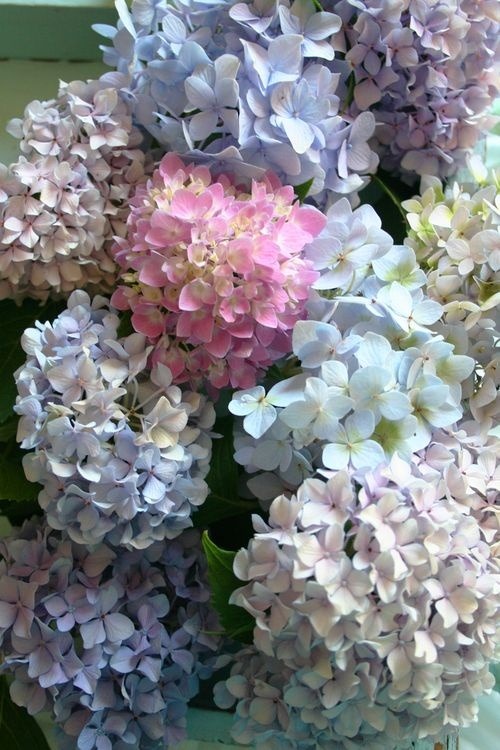
Provided we don't have any global cooling events, Hydrangeas grow with vigor and verve on Cape Cod. Hydrangeas love our soil and temperature conditions and we can't complain when they keep us well supplied with an abundance of blooms for floral arrangements almost all summer long.
Cape Cod Hydrangea Foundation Planting
2. Starfish
In addition to hydrangea bouquets cut right from your own garden, every Cape Cod cottage needs a selection of starfish to sit upon the window panes. You can stand them on the window ledges of the front facing rooms or add them to a stunning view from a coastal kitchen. Place them in a glass jar or scatter them across a table. Starfish also look coastal chic in the sidelights of front entry doors.
Cape Cod Kitchen: Hydrangeas & Starfish
3. Signs
Houses on Cape Cod often feature traditional quarterboards with distinctive names. That has lead to the popularity of signs that show how much you love your Cape House. (You wouldn't have moved here if you didn't, but a little reinforcement never hurt anyone.) This great Cape Cod Enjoy! Sign has a handy peg in the back that lets you stand it on a shelf, or you can hang it on the wall. Take it with you when you leave for the winter and you can be reminded of Cape Cod all year long...
Growing Your Own Hydrangeas
Now that you have everything you need for your Cape Cod cottage, you can start playing with and multiplying your hydrangeas. The first thing you need to do is take cuttings from a Hydrangea Bush. I would heartily recommend you use cuttings from a bush on your own property, a hydrangea that shows a propensity for the soil in your yard. It is also not recommended that you take cuttings from someone else's hydrangeas unless you don't mind interacting with the local police.
Grab your hydrangea cuttings and these simple tools.
We actually had some Hydrangea Heisters hit a number of Cape Cod homes and pilfering their hydrangea blossoms to sell to the flower markets for $8 a stem. Yes, hydrangeas were wholesaling for $8 a stem about 15 years ago! I'm not sure what they go for now, but back then thieves were cashing in on the blooms of unsuspecting Cape Cod cottage owners. So, take my advice, only use cuttings from your own hydrangea bushes or ask permission before you clip.
I grew some cuttings in my strawberry patch and got strawberry colored blooms...
The Easy Way to Grow Hydrangeas
1. Clip 9"-12" Long Cuttings
In July, while my favorite Hulkamania Hydrangeas (not a real variety--mine are just huge) were blooming, I took 5 Stem Top Cuttings. I looked for stems without flowers, on newer wood. Nice green shoots seem to work the best.
Clip 9"- 12" cuttings to allow for at least 4 inches for inserting into the ground. Pull off any lower leaves but be sure to leave at least 2 pairs at the top of the stem. Cut the bottom leaves in half as seen below. (Not sure why, but I think I read somewhere that this is helpful to stimulate new growth...)
2. Find a Good Spot to Plant Cuttings
I knew I wanted to get these hydrangeas started right into my garden's soil (why mess around with containers?), so I cleared an area around the outer edge of my raised beds. The method to my madness was such: if someone (Joe) should take the time to water his vegetable garden, my hydrangea babies would (at least) get some of the overflow...
I seem to have the best luck with hydrangeas that get full sun in the morning and shade in the the afternoon, something to take into consideration.
Use a pencil to make a hole in the ground for each stem envisioning the future shape of your hydrangea bush...
This is how they looked after a month...
3. Dip Bottom Tips into Rooting Hormone & Plant
Take your cuttings and dip the bottoms into a jar of rooting hormone. I purchased rooting hormone at my local garden center, Hart Farm.
Gently insert the stems into each pencil hole, then fill in the dirt and press down...
I gave them a good drink, and said, "sayonara girls, grow happy"... And that's it!
They survived the Fall and Winter and made it to Spring!
Honestly, I didn't have anything else to do with their upbringing. I barely have enough time to do laundry, vacuum, or eat anything besides ice cream during the summer months, so no, I really didn't take very good care of my hydrangea babies that summer. And that's why I am so amazed how easy it is to grow your own hydrangeas! After several years, look at how they have grown:
So what do you think? Will you take some cuttings and grown your own Hydrangeas? Have you tried any other ways to grow Hydrangeas? We'd love to hear your thoughts.
I love to slather Ganache on top of Bundt cake, especially, Chocolate Bundt Cake. And I also love creamy filling. That's what lead to this creation, our Ganache Topped Devil Dog Cake. The addition of ganache makes it dog-gone delicious!
Watch as we turn an every day Chocolate Bundt Cake into a Devil Dog Bundt Cake and kick it up a notch with the addition of the most delicious Ganache Chocolate:
It's always important to have the right tools for the job, and for making a Bundt Cake, it couldn't get more essential than using the right pan. Nordic Ware's Platinum Bundt Pan is top rated and as our video shows, it makes the perfect, most amazing Bundt Cake.
And where would I be without this Wire Cooling Rack? So versatile, we use it for everything from baking chicken to cooling off cakes and cookies. Since we usually have a lot going on in our kitchen, we have about 4 of these excellent racks.
This cake looks great, doesn't it? But it could be better. Frosting it would take away from the beautiful edge created by the NordicWare Bundt Pan. The only worthwhile alternative it to slice it in half and spread across some incredible cream filling. Buttercream is always a nice choice.
Another great tool to have in your arsenal is a long serrated knife and it was absolutely necessary in order to cut this Bundt in half in order to 'devil dog' it. This 12" Slicer from Dexter is made in Massachusetts and most often used to slice bread and roasts, but it's also perfect for slicing cake.
And never skimp on chocolate chips! Love those little devils.
It's important to use your favorite chocolate for your Ganache. And spread it on thick!
Cape Cod Potato Chip Bark popped into my head on the way home from work one cold, dark rainy Cape Cod evening. (What is it about shorter days and dropping temperatures that makes me crave chocolatey confections?) The night before I was inspired to make Cape Cod S'mores Bark and I knew from the reception it had received that a sequel was in order. But how do you top S'mores Bark? And that's when it hit me, chocolate covered potato chips!
Love at First Bite
I first tasted chocolate covered potato chips about 10 years ago at a food show Joe and I attended. The two of us had to be asked to leave the booth. Never before had we experienced such an unearthly combination of salty and sweet. And we had to be careful not to experience it again too soon. The fact that potato chips aren't allowed in our house 362 days a year didn't give me pause as I headed on towards our neighborhood grocery store for the only chips worthy of what I was planning, our island's very own Cape Cod Potato Chips.
Just 2 ingredients, a half sheet pan, and a piece of parchment paper
If you've never made chocolate bark before, the most dangerous part to consider is how is easy it is to make, because you may start making bark morning, noon, and night. Once you've decided on your potato chips, choose your favorite chocolate for melting. After indulging in milk chocolate in our S'mores bark the night before, I decided our potato chips would be complemented by a luscious dark chocolate. I happened to have Dark Chocolate Candy Melts on hand which are perfect for making bark because they are ideally suited to melting. You can use chocolate bars or chips, too. In fact, chocolate bars are super for making bark. If you use chocolate chips, you may want to add a little shortening to make it smoother.
Melt over a double boiler
Before you get melting, it's important to prepare your potato chips. I poured out about 1/3 of the bag for crushing into small pieces. Use cellophane or a baggie to keep your hands from getting greasy. Also make sure you have a sheet pan lined with parchment paper waiting in the wings. I found that a quarter sized sheet pan (9" x 13") was the perfect size for this recipe.
Now you're ready to start melting. I like melting my chocolate using a double boiler made from a stainless steel bowl sitting on top of a simmering pot. It's more hands-on than using a microwave and there's less mystery or risk of wrecking the chocolate. Plus, I love stirring and inhaling chocolate. Once your chocolate is melted, mix in your crushed potato chips and thoroughly coat them.
Then spread the coated chocolate-potato chip mixture into your parchment-lined sheet pan. At this point I decided I wanted to add another layer of chocolate because I planned on sprinkling more chips on top and it looked like they needed a little more to sink into. So it was back to the double boiler with another cup of chocolate melts.
Spread your next layer of chocolate and then sprinkle with more crushed chips. Push the chip-chips into your top layer, then head for the refrigerator. In less than 1/2 and hour, your bark is ready to break apart into servings. I chose to slice my bark into small pieces so that I could put them in little cups to give out to customers during our Christmas Open House.
You can leave your bark in an air-tight container for several days, but most likely it won't last that long! For a printable, easy-to-follow recipe click HERE.
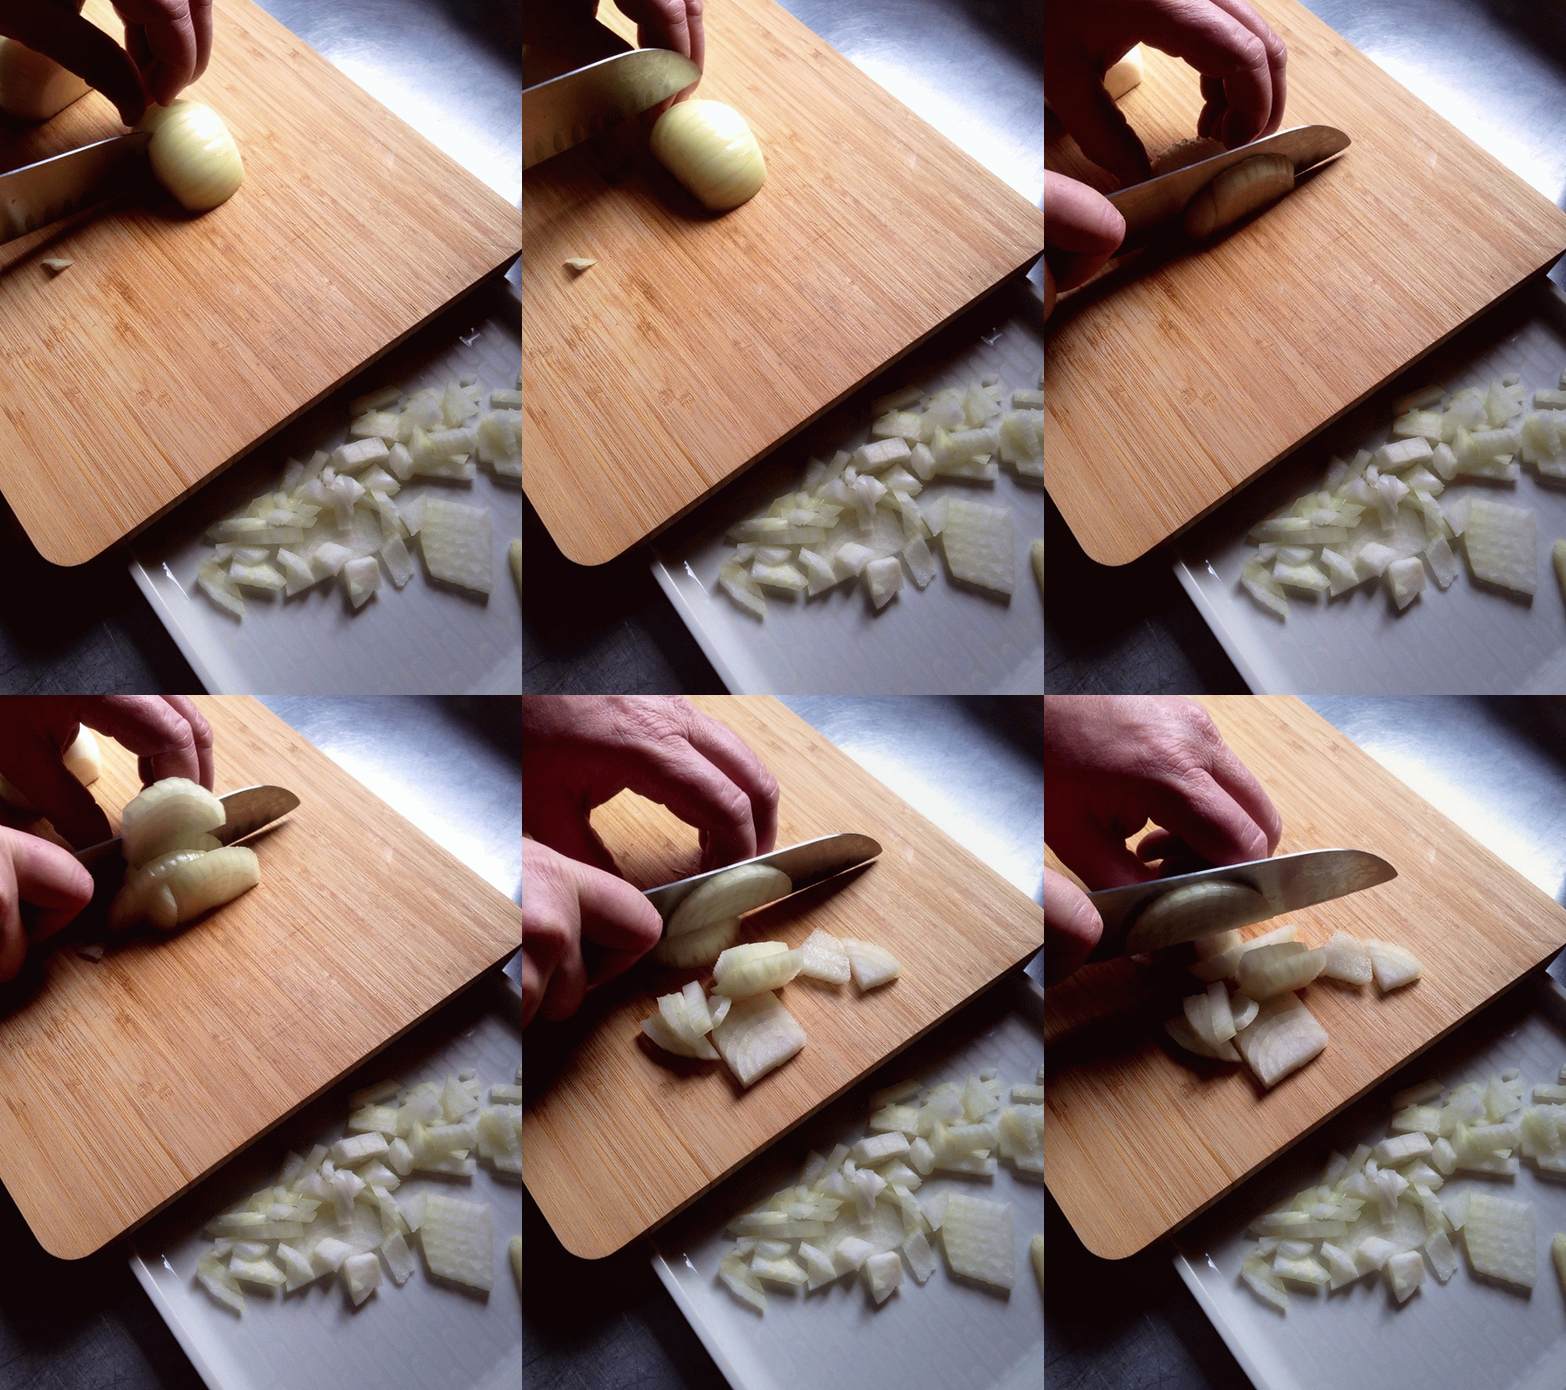
I heard that the Super Bowl is the second biggest day of eating next to Thanksgiving. That helps explain why Joe is so busy chopping onions! (It seems like he just can't stop!) This is our favorite cutting board, btw.
One of his go to recipes to make for Super Bowl Sunday is his amazing Persian Infused Spicy Beef Nachos. His unique blend of spices helps to give these nachos a flavorful advantage over your everyday loaded nachos appetizers.
So enough with the pre-game show, let's get on with the recipe for Persian-influenced Spicy Beef Nachos. Yes, these nachos are not your typical Mexican-style but have more of a middle eastern flavor.
I can't proceed without sharing Joe's passion for quality meat. Every week, he drives across Cape to go to his favorite butcher at Peterson's Market in Yarmouth Port. We live practically next door to a large super chain supermarket, which is convenient, but you can definitely taste the difference, hence the long trip to Peterson's. So get some nice, lean ground beef, a couple of sweet (Vidalia if possible) onions, paprika, mustard powder, curry powder, chili powder, allspice, and cinnamon...oh, and don't forget the garlic. I don't think Joe makes anything without garlic. I've even found garlic cloves in the washing machine after doing the laundry...that's another story...Get out a sharp knife and start chopping. Make sure you have sour cream and salsa on hand and my favorite, guacamole.
Want to make something fun for the big game? Joe's had Pigs-in-a-Blanket on the brain lately, but wasn't getting much in the way of feedback from the peanut gallery. What's a good chef to do? Kick it up a notch with Pigs-in-a-Pretzel. We enthusiastically cheered for home made Pretzel Dogs and you can watch him make them in this fun Pretzel Dog video.
As you can see, making the dough is a pretty simple process...
Then it's just a matter of letting the dough rise a bit, then wrapping your dogs...
After giving your dogs a little water bath, salt them then pop them in the oven for about 10-15 minutes.
The fun of making Pretzel Dogs is nothing when compared to the faces of your game-day guests when presented with a platter brimming with Pretzel Dogs. Joe made a great Loaded Spicy Beef Nacho platter to go with our Pretzel Dogs. Stay tuned for that recipe!
1. Combine flour, salt, sugar, yeast and 1 cup water by hand or with a mixer.
2. Knead dough for about 5 minutes.
3. Lightly flour dough and allow it to rest for about 30 minutes.
4. Stretch out dough a bit, then with a bench knife cut into 8 finger-sized pieces.
5. Roll your dough pieces out until they are about 8" long.
6. Beginning at the end of an uncooked hot dog, wrap one dough 'snake' around each hot dog.
7. Let the wrapped hot dogs rest a bit in a baking dish while you prepare a hot water bath.
8. Dissolve baking soda in one cup of boiling water.
9. Pour water over dogs, then transfer to a sheet pan and sprinkle with salt.
10. Bake for 10-15 minutes.
I must admit that I'm not a fan of Candy Corn. In fact, there would have to be a monetary transaction or some sort of hazing incident to get me to eat one, even still, I think they are a cute, adorable emblem for Fall and Halloween.
In the mood to bake something Fall-inspired, we opened our baking pan cabinet and the first pan to -fall out- was our NordicWare Scone Pan! And just like that, the triangular forms screamed, CANDY CORN!!!
Pressed for time before starting dinner, we grabbed a box of Pillsbury's Banana Quick Bread Mix from the pantry, a bag of White Chocolate Candy Wafers, and some yellow and red Gel Food Colors. In no time at all we baked, melted, frosted and created our own {IMO} tastier version of Candy Corn. Take a peek of our first Vine Video of the process!
We considered making frosting, but the Candy Wafers were so much easier and the combined taste of banana and white chocolate worked really well.
Just melt the Candy Wafers in the microwave, add a drop (a little goes a long way) of Gel Food Color, and get corny!
Now that's a Candy Corn I can wrap my mouth around! Yum!
We're totally into the Chalkboard look around here. In fact, this winter we painted untold surfaces with chalkboard paint. As you can see, I even designed our latest advertisement a la chalkboard.
Just the other day, Joe came home with a set of these super cute chalkboard clips for me...how sweet.
Then inspiration struck him. He loves his little Melissa & Doug Mini Scratch Art Notes, and when things are kinda slow, he [occasionally] likes to pass-the-while doodling. And then it came to him, Scratch Art-Board Clips!
First he drew his artwork, then he affixed regular old clothespins with Zots, but you could use any kind of adhesive. He then used some as informative 'shelf-talkers', one of which is (not misspelled, i stand corrected) written in French! [who knew?]
Fun, cute, and useful, try making some Scratch Art 'Chalkboard' Clips of your own with our Mini Scratch Notes.